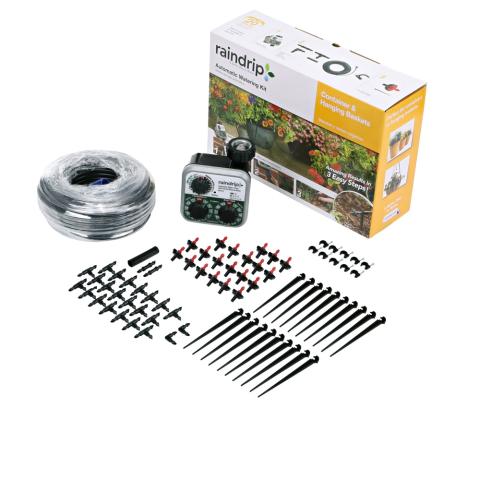
Raindrip Container & Hanging Baskets Kit FAQs

Please download and view the R675CT instructions (PDF) or view our “How to” video below that takes you through, step by step, how to program and install your Raindrip timer.
Cut the tip of the tubing at a 45° angle, push the tubing onto the adapter and then turn the collar. At least ¾” of the tubing should be inserted onto the swivel to secure a proper connection.
Alternatively, you can also leave tubing outside, exposed to direct sunlight or use a hairdryer to heat up the tubing. This will cause the tubing to become softer and help ease installation.
An anti-syphon device is only necessary when the water will be traveling uphill, or when your planter box will be at a higher elevation than the hose bib or faucet.
Check the water pressure. It must be 15 to 35 psi.
Check for kinks in the tubing.
Make sure timer is operating correctly (refer to timer instructions)
Flush the supply line.
Raindrip recommends that all Pressure Compensating Drippers (PC Drippers) should not be installed more than 8 feet above water source.
Yes, Raindrip tubing is made out of polyethylene with built-in UV inhibitors.
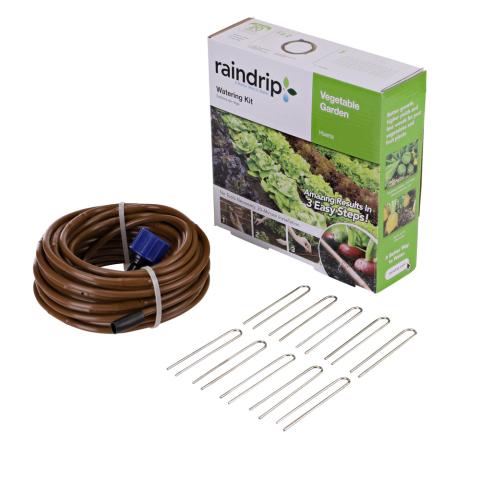
Raindrip Vegetable Garden Kit FAQs

Cut the tip of the tubing at a 45° angle, push the tubing onto the adapter and then turn the collar. At least ¾” of the tubing should be inserted onto the swivel to secure a proper connection.
Alternatively, you can also leave tubing outside, exposed to direct sunlight or use a hairdryer to heat up the tubing. This will cause the tubing to become softer and help ease installation.
An anti-syphon device is only necessary when the water will be traveling uphill, or when your planter box will be at a higher elevation than the hose bib or faucet.
Check the water pressure. It must be 15 to 35 psi.
Check for kinks in the tubing.
Make sure timer is operating correctly (refer to timer instructions)
Flush the supply line.
½ GPH per emitter at 12-inch spacing.
Yes, Raindrip tubing is made out of polyethylene with built-in UV inhibitors.
No, drip tubing cannot be buried. However, if you would like to cover the tubing, Raindrip suggests you cover it with mulch.
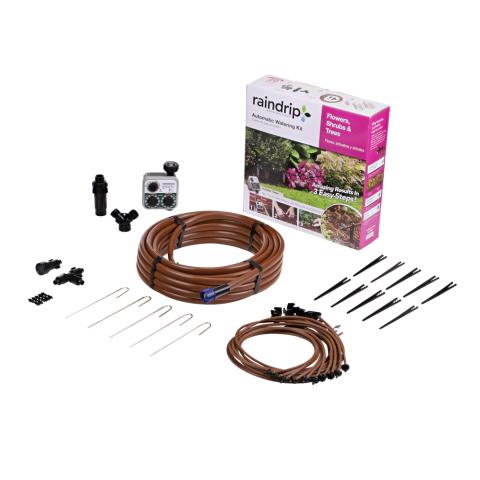
Raindrip Flowers, Shrubs & Trees Kit FAQs

Please download and view the R675CT instructions (PDF) or view our “How to” video below that takes you through, step by step, how to program and install your Raindrip timer.
Ensure exposure of the tapered end by rotating collar clockwise.
Using force, insert tubing onto tapered end.
Twist counter-clockwise to cover tubing and secure with the collar.
Install fittings according to garden design.
Yes, all Raindrip systems should have a pressure regulator. The filter included in this kit has a built-in pressure regulator.
Each dripper has a flow rate of 2 GPH.
Yes, and it is very easy to do so. To extend the feeder line simply remove the ¼” tubing from the barb fitting, add the additional length of tubing, and then reconnect to the barbed fittings. Simply purchase the additional tubing needed.
Yes! Multiple Flower, Shrub & Tree Kits may be connected to each other. You may also remove the flush cap at the end of the supply tubing and then add a ¾” hose swivel x 0.71” Compression Adapter. Please note that the supply tubing has an outside diameter of 0.71”.
Yes, Raindrip tubing is made out of polyethylene with built-in UV inhibitors.
Yes, the supply tubing and feeder lines can be buried. You may also cover the tubing with mulch.
To help alleviate or minimize this problem Raindrip suggests you fill small containers with water and scatter them around your area. Squirrels and other rodents chew on Raindrip product due to the ease of accessing water. Providing them with other sources of water can deter them from chewing up your product. If this solution does not help with your problem, you can use wire screen mesh to protect the product from ease of access by these rodents. Note: the mesh may interfere with the spray radius of the sprinkler heads.
Check the water pressure. It must be 15 to 35 psi.
Check for kinks in the tubing.
Make sure timer is operating correctly (refer to timer instructions).
Flush the supply line.
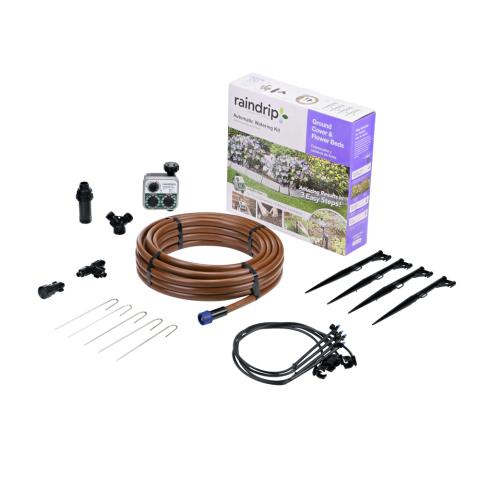
Raindrip Ground Cover & Flower Beds Kit FAQs

Please download and view the R675CT instructions (PDF) or view our “How to” video below that takes you through, step by step, how to program and install your Raindrip timer.
Ensure exposure of the tapered end by rotating collar clockwise.
Using force, insert tubing onto tapered end.
Twist counter-clockwise to cover tubing and secure with the collar.
Install fittings according to garden design.
Yes, all Raindrip systems should have a pressure regulator. The filter included in this kit has a built-in pressure regulator.
Each sprayer will put out a water flow of 0-24 GPH. The spray radius and flow can be controlled with the adjustable valve.
Yes, and it is very easy to do so. To extend the feeder line simply remove the ¼” tubing from the barb fitting, add the additional length of tubing, and then reconnect to the barbed fittings. Simply purchase the additional tubing needed.
Yes! Multiple Flower, Shrub & Tree Kits may be connected to each other. You may also remove the flush cap at the end of the supply tubing and then add a ¾” hose swivel x 0.71” Compression Adapter. Please note that the supply tubing has an outside diameter of 0.71”.
Yes, Raindrip tubing is made out of polyethylene with built-in UV inhibitors.
Yes, the supply tubing and feeder lines can be buried. You may also cover the tubing with mulch.
To help alleviate or minimize this problem Raindrip suggests you fill small containers with water and scatter them around your area. Squirrels and other rodents chew on Raindrip product due to the ease of accessing water. Providing them with other sources of water can deter them from chewing up your product. If this solution does not help with your problem, you can use wire screen mesh to protect the product from ease of access by these rodents. Note: the mesh may interfere with the spray radius of the sprinkler heads.
Check the water pressure. It must be 15 to 35 psi.
Check for kinks in the tubing.
Make sure timer is operating correctly (refer to timer instructions).
Flush the supply line.
